Earlier in the month, we took you through the first tutorial mission for the upcoming strategy game, Panzer Corps by Matrix Games. Now, it’s time to take you through one of the ‘proper’ scenarios. Poland is probably the first scenario that people will play, as it’s a relatively short and straightforward game, but it does feature aircraft and on the higher difficulty levels, it’ll put up a challenge.
For the purposes of this walkthrough, this is played on the easiest difficulty level as the Axis army, and took me 11 turns to complete.
Turn 1
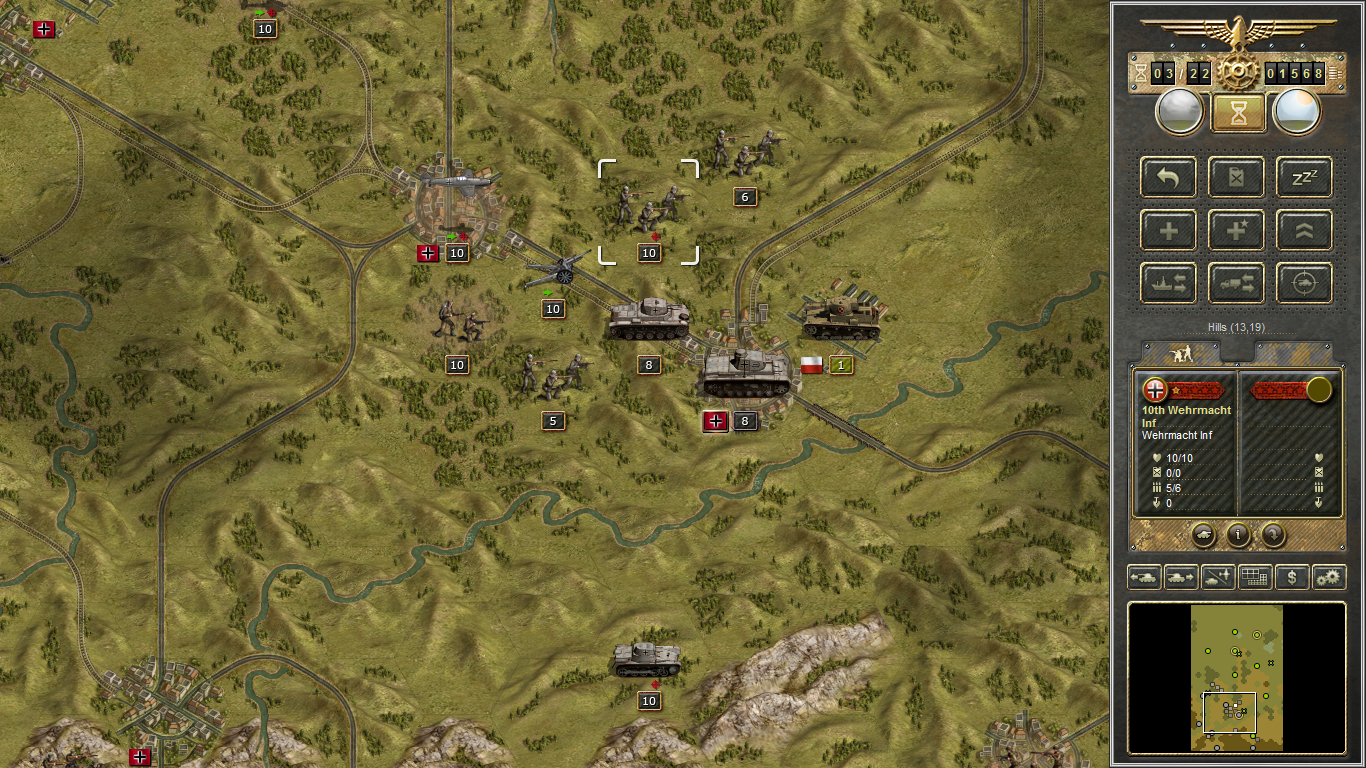
So, when the game starts, this is the battlefield that you’ll be looking at: As the invader we’ll be rolling up and through the territory, from south through to north:

Thanks to the fog of war, my view of the battlefield is limited, but my first priority will be to establish contact with my Slovak allied infantry in far south east. To do that my southernmost units will grab the nearby town, then whip around the mountain, while the bulk of my military will take the centre of the region. I’ll leave a few units protecting my flank, but for now I’m not going to concentrate on the northern cities.

But first I’ll get the Slovaks to do some fighting. I order the single unit of infantry to engage the Polish infantry entrenched in the city just north of them.

Meanwhile the bulk of my army starts to march on the cities just to the east. I open up that skirmish with an artillery barrage, then move the rest of the units forwards.
Turn 2
Sheer military weight rolls me through into the town. To my north I see an enemy plane. This is potentially a problem. Unfortunately I can’t do anything about it right now. Why? bad weather. The interface to the right hand side of the screen features a weather indicator on the top. It’s currently raining, meaning planes don’t get to do a whole lot. The prediction is that the weather will clear up next turn though (the icon next to the one I’ve circled in red is an indicator of what to expect next turn), so I’ll worry about that plane then.

In the fighting so far, one of my units suffered light casualties. Spending a little ‘reputation’ (the game’s ‘currency’) will allow me to build the unit’s strength back up to full, and I have plenty of reputation to go around, so I splash out a little. It does mean the unit can’t move this turn though. They’ll have to march hard next turn.

Turn 3
While the body of my army is making good progress, those Slovaks have failed to take their city. This is starting to prove to be a problem. On the higher difficulty levels I don’t want a pesky enemy city sandwiching my forces.

I’m also expecting the fighting to heat up now, so it’s time to call in some reinforcements. I decide on a reasonably high quality infantry unit. Without a truck, it won’t move very fast, but should I get bogged down in some gunfire, it’ll help to have this unit in reserve. I have plenty of reputation points and room in my army to recruit up to four additional units, so this isn’t going to hurt my war chest any. I place the unit at the rear of my army, to start moving up into the fray next turn, but I will give the Slovaks one more turn before recruiting more infantry into that little army.

For the rest of the turn I concentrated on rolling into the other major central city. I’ll be able to use that as a launchpad for further engagements across the battlefield, so though it is potentially an expensive exercise (the city being protected by artillery as well as infantry), I attacked hard nonetheless. By the end of turn I had pushed the enemy back, suffering some minor casualties, but crippling their units. The enemy planes had fled last turn, so I’d need to track them down later.
Turn 4
The enemy planes were back (circled in yellow; planes can occupy the same space as ground units). So it was time to deal with them. Luckily, I have an air force of my own.

The Slovaks were also seriously struggling. One more round of combat left the unit almost destroyed. I decided to retreat and work on a different way of dealing with that heavily entrenched Polish unit.

So first up my planes engaged the enemy. However, they were also running out of fuel, prompting a warning message to pop up. Luckily, the situation wasn’t too dire just yet – the ‘dangerous hexes’ the prompt warns off are at the very limit of the unit’s movement range at this stage. I figure I have enough time to make an attack, since the city my ground forces captured last turn came with an airfield for the planes to refuel at.

To deal with the southern Polish city, I sent one of my German tanks that way, and built another unit of Slovak infantry. It was perhaps not my ideal use of a reinforcement slot, but figured I could work out a use for them anyway.

Turn 5
By the start of turn five, I owned about half the map – very rapid progress in a game that was set to last over 20 turns (then again, I’d be a bit worried if I couldn’t win on this difficulty setting).

So my next plan was to split my central force into two, one to move up the middle of the battlefield to take the centremost cities. The other to worry the eastern flank. These units would be supported by the Slovaks once the southern city was dealt with. My western units would remain watchful for enemy movements, but stationary for the moment.

Turn 6
I used turn six to regroup, let stragglers catch up, and position for the next round of engagement.

Turn 7
The first step in turn 7 was to march into the easternmost Polish city, which was unguarded. Unfortunately, the tank that took the city would miss the next turn – a little fuel icon underneath the tank told me it needed a turn to resupply.
It was also time to prepare for the invasion of the western cities. I didn’t want to dedicate any of my current resources, for fear of spreading things too thin, so instead decided to use my abundant reputation resources to recruit a powerful tank and bomber plane, which I positioned at my northernmost city. They’d be joined next turn by one unit of infantry to improve the chances of any ground assaults I could make.

And at the close of turn 7, this is how thing stood. From turn 8 I would march all units northwards simultaneously.

Turn 8
The eastern side of the battlefield proved to be easy progress for my two units of Slovak infantry, which used their trucks to be more mobile – I knew the chances of an attack on them would be remote. They would go after the airfield next turn.

Meanwhile on the western flank, the bomber opened up an assault on the enemies entrenched in the city. This was followed up by an infantry assault as my powerful Panzer rolled closer…

The center battle would be far more difficult. The enemy had multiple cavalry units entrenched around the city, and given its tactical importance, I assumed that there would be backups hiding in the fog of war – possibly even artillery. So rather than attack, I moved some more units into position for the next turn.

Turn 9
At the start of the turn, this is how things looked. I had an easy path through the east and west, and I was prepared for the most intense engagement of the game in the center:

So the first step was to move up and see exactly what I was facing in the middle city. Unsurprisingly, it was the most well protected city in the game.

Having dealt with the city to the west, I got my bomber plane to assist in the assault, as some enemy artillery showed its face to help defend against an attack on the cavalry. By now though my units were too numerous and too experienced to be genuinely threatened by the resistance.

Turns 10 and 11
From here, it was a mere formality. There were a few enemy artillery protecting the final few cities, but no match for my entire army bearing down on them from all angles.


Panzer Corps is due for release soon. Stay tuned for more coverage as the big day draws ever closer.